
Last summer, I spent hours upon hours refinishing my childhood bunk beds for the kiddos. I finally had them up, and the kids moved into them – they were THRILLED! Now, these bunk beds predate my birth – my mom picked them up at a yard sale in the early 80’s – so the top bunk didn’t have a safety rail / guard rail. I didn’t think anything of it, because my sister and I both survived the bed without any incident.
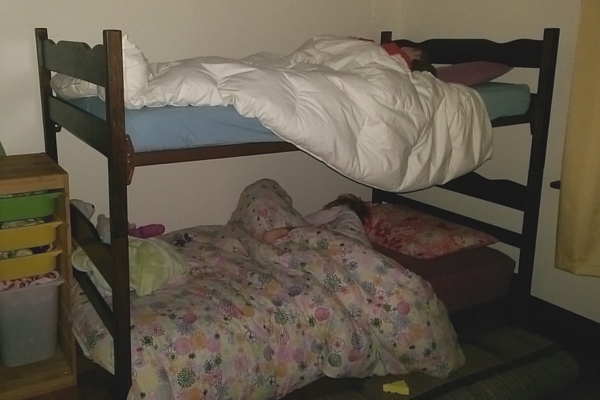
ACK! Look at how UNSAFE they are!!
But, surprise surprise, not 5 minutes after I posted my “Yay! The kids finally have real beds to sleep in!” post on Facebook, I got comment after comment expressing shock and disapproval that I was letting my not-even-5-year-old sleep on a top bunk without a safety rail! [collective gasp]
After the 4th person who said, “I broke my [insert random bone here] when I fell off of my bunk bed and I was 10!“, I decided that, rather than risk a call to CAS, I’d put a darn bed rail on the top bunk, but I wasn’t going to spend any money on it. And I didn’t.

Phew! No one’s breaking any bones on MY watch!
And now I shall teach you how to make a bed safety rail for free (or less than $5, if you don’t have the brackets at home already).

I gathered my materials:
- A spare length of plywood from the basement
- two metal shelf brackets from the workshop (~ $2/each at Home Depot)
- a handful of short screws
- a sander
- stain (leftovers works great!)
- varathane (a really small amount – borrow some if you don’t already have an open can!)
- a drill
First, I sanded down my board. Plywood can be rough and splintery, and I didn’t want my kiddo to get slivers or have his sheets caught & ruined on the wood.
Next, I stained it several times by brushing it gently with a foam brush and rubbing it in with an old t-shirt.
When the stain was dry, I put a thin coat of verethane on it to seal in the stain and protect it from whatever ills a child might expose it to.

Finally, I screwed the brackets into the wood, one on each end of the board. I attached the shorter end of the bracket to the board so that the longer end could slide under the mattress.

Take that, worry warts: my son has the safety rail that you so desperately thought he needed, and I didn’t have to pay a cent for it. Boo-yah.
Disclaimer: Please make and use at your own risk. This will not work well if you use SHORT brackets. Make sure that the long side of your bracket is at least 8″ in length, if not longer.

Jenn vanOosten
Latest posts by Jenn vanOosten (see all)
- How I Epically Failed the #RenewLife 30 Day Challenge… and Why that Failure is Helping Me Kick Off a Great 2018 - January 8, 2018
- What to Watch on Netflix: Jenn’s Top Picks from 2017 #StreamTeam - January 2, 2018
- I’ll take my Netflix To Go, Please! - December 5, 2017


